저번시간에 언급하였듯이.. 구현해야할 목록들은,
1. Data 한번에 전송되게 하기
2. Socket, listen을 Switch문 안에 넣어 구현하는 것을 생각해보자.
3. UART Data를 interrupt로 받아 처리하기.
입니다. 코드는 아래와 같습니다.
하지만, 여기서 구현된건 2번과 3번만 구현되었습니다.
[code language="c"]
/*
===============================================================================
Name : W5500-EVB.c
Author : $(author)
Version :
Copyright : $(copyright)
Description : main definition
===============================================================================
*/

#if defined (__USE_LPCOPEN)
#if defined(NO_BOARD_LIB)
#include <chip.h>
#else
#include <board.h>
#endif
#endif

#include "cr_section_macros.h"
#include "socket.h"
#include"spi_handler.h"
#include "w5500_init.h"

// TODO: insert other include files here

// TODO: insert other definitions and declarations here
#define SOCK_TCPS0 0
#define DATA_BUF_SIZE 2048
#define SERIAL_BUF_SIZE 2048
uint8_t gDATABUF[DATA_BUF_SIZE];
uint8_t SERIAL_BUF[SERIAL_BUF_SIZE];
uint8_t SERIAL_SIZE = 0;
/* for문을 사용하여 Ethernet Data를 Serial Data로 출력 */
int EtherToSerial(uint8_t* buf, uint16_t size) // Client로부터 Data Read
{
	uint8_t i;
	for (i = 0; i < size; i++){
		putchar(buf[i]);
	}
	return 0;
}

int SerialToEther(uint8_t sn) // 폴링으로 Serial(UART)Data 읽어서 Client로 송신
{
	send(sn, SERIAL_BUF, SERIAL_SIZE); // buffer DATA를 송신
	SERIAL_SIZE = 0; // buffer DATA를 송신

}
void UART_IRQHandler(void)
{
	if ((Chip_UART_ReadLineStatus(LPC_USART) & UART_LSR_RDR) == 1){
		SERIAL_BUF[SERIAL_SIZE] = Chip_UART_ReadByte(LPC_USART); // UART Data를 읽어서 buffer에 넣음
		SERIAL_SIZE++; // 저장할 배열 증가
	}

	int main(void) {

		uint8_t ip[4] = { 192, 168, 0, 45 };
		uint16_t port = 23;
		uint8_t sn = SOCK_TCPS0;
		uint16_t size = 0;

#if defined (__USE_LPCOPEN)
#if !defined(NO_BOARD_LIB)
		// Read clock settings and update SystemCoreClock variable
		SystemCoreClockUpdate();
		// Set up and initialize all required blocks and
		// functions related to the board hardware
		Board_Init();
		// Set the LED to the state of On
		Board_LED_Set(0, true);
#endif
#endif
		SPI_Init();
		W5500_Init();
		Net_Conf();

		Chip_UART_IntEnable(LPC_USART, (UART_IER_RBRINT | UART_IER_RLSINT)); //uart enable

		/* Enable UART 0 interrupt */
		NVIC_EnableIRQ(UART0_IRQn);


		//printf("%d:Connecting, ip[%d.%d.%d.%d] port [%d]\r\n", sn, ip[0], ip[1], ip[2], ip[3], port);

		while (1) {
			switch (getSn_SR(sn)) { // Sn_SR(sn) check if) listen state? goto ESTABLISHED
			case SOCK_CLOSED:
				if (socket(sn, Sn_MR_TCP, port, 0x00) == sn){ // socket create
					printf("%d:Socket Opened\r\n", sn);
				}
				else{
					printf("%d:Socket Error\r\n", sn);
					while (1); // end to error
				}

				break;
			case SOCK_INIT:
				//printf("%d:Connecting, ip[%d.%d.%d.%d] port [%d]\r\", sn, ip[0], ip[1], ip[2], ip[3], port);
				/*
				if(connect(sn,ip,port)==SOCK_OK);
				else {
				printf("%d:Connect Error\r\n",sn);
				while(1);
				}
				*/
				if (listen(sn) == SOCK_OK){ // listen state
					printf("%d:listen\r\n", sn);
				}
				else{
					printf("%d:listen error\r\n", sn);
					while (1);
				}

				break;
			case SOCK_LISTEN:
				/* TCP Server Mode */

				break;
			case SOCK_ESTABLISHED:
				/* TCP ESTABLISHED */
				//Connect Interrupt Check
				if (getSn_IR(sn) & Sn_IR_CON) {
					printf("%d:Connected\r\n", sn);
					setSn_IR(sn, Sn_IR_CON);
					Board_LED_Set(0, false);
					Board_LED_Set(1, true);
				}
				//Receive Data Check
				if ((size = getSn_RX_RSR(sn)) > 0) {
					if (size > DATA_BUF_SIZE) size = DATA_BUF_SIZE;
					recv(sn, gDATABUF, size);
					EtherToSerial(gDATABUF, size);
				}
				SerialToEther(sn);
				break;

			case SOCK_CLOSE_WAIT:
				/* Disconnect request */

				break;
			}
			//NVIC_DisableIRQ(UART0_IRQn);
			//Chip_UART_DeInit(LPC_USART);
		}
		return 0;
	}

[/code]
1.Data 한번에 전송되게 하기
- 2번, 3번 문제를 먼저 봐주세요. 다음번에 구현하도록 합니다.
2. Socket, listen을 Switch문 안에 넣어 구현하는 것을 생각해보자.
[code language="c"]

while (1) {
	switch (getSn_SR(sn)) { // Sn_SR(sn) check if) listen state? goto ESTABLISHED
	case SOCK_CLOSED:
		if (socket(sn, Sn_MR_TCP, port, 0x00) == sn){ // socket create
			printf("%d:Socket Opened\r\n", sn);
		}
		else{
			printf("%d:Socket Error\r\n", sn);
			while (1); // end to error
		}

		break;
	case SOCK_INIT:
		//printf("%d:Connecting, ip[%d.%d.%d.%d] port [%d]\r\", sn, ip[0], ip[1], ip[2], ip[3], port);
		/*
		if(connect(sn,ip,port)==SOCK_OK);
		else {
		printf("%d:Connect Error\r\n",sn);
		while(1);
		}
		*/
		if (listen(sn) == SOCK_OK){ // listen state
			printf("%d:listen\r\n", sn);
		}
		else{
			printf("%d:listen error\r\n", sn);
			while (1);
		}

		break;
	case SOCK_LISTEN:
		/* TCP Server Mode */

		break;
	case SOCK_ESTABLISHED:
		/* TCP ESTABLISHED */
		//Connect Interrupt Check
		if (getSn_IR(sn) & Sn_IR_CON) {
			printf("%d:Connected\r\n", sn);
			setSn_IR(sn, Sn_IR_CON);
			Board_LED_Set(0, false);
			Board_LED_Set(1, true);
		}
		//Receive Data Check
		if ((size = getSn_RX_RSR(sn)) > 0) {
			if (size > DATA_BUF_SIZE) size = DATA_BUF_SIZE;
			recv(sn, gDATABUF, size);
			EtherToSerial(gDATABUF, size);
		}
		SerialToEther(sn);
		break;

	case SOCK_CLOSE_WAIT:
		/* Disconnect request */

		break;
	}
}
return 0;
}
/* 이전에 작성해두었던 socket 생성과 listen 상태로 들어가는 구문을 그대로 Switch문에 넣어주기만 하면 됩니다. 물론, Switch문이 어떤건지는 알고 있어야 제대로 이해하실 수 있습니다. */

 [/code]
- Switch 문을 위의 Code로 구현하였다면 아래와 같은 Flow로 Socket이 동작됩니다.
만약, 위의 Flow를 보아도 잘 모르겠으면,
전혁진 강사님의 블로그 - http://jindabang.net/2015/01/05/3-w5500%EC%9C%BC%EB%A1%9C-%EC%9D%B4%EB%8D%94%EB%84%B7-%EA%B5%AC%ED%98%84%ED%95%98%EA%B8%B0-echo-server/
를 참조하시기 바랍니다.
3. UART Data를 interrupt로 받아 처리하기.
[code language="c"]
void UART_IRQHandler(void)
{
	if ((Chip_UART_ReadLineStatus(LPC_USART) & UART_LSR_RDR) == 1){
		SERIAL_BUF[SERIAL_SIZE] = Chip_UART_ReadByte(LPC_USART); // UART Data를 읽어서 buffer에 넣음
		SERIAL_SIZE++; // 저장할 배열 증가
	}

	Chip_UART_IntEnable(LPC_USART, (UART_IER_RBRINT | UART_IER_RLSINT)); //uart enable

	/* Enable UART 0 interrupt */
	NVIC_EnableIRQ(UART0_IRQn);

	/* - 위의 2 구문 Chip_UART_IntEnable(LPC_USART, (UART_IER_RBRINT | UART_IER_RLSINT));
	NVIC_EnableIRQ(UART0_IRQn); 으로 인터럽트 가능. void UART_IRQHandler(void) 은 인터럽트
	걸리면 실행되는 구문 */

	/* 1. interrput를 하기 위해서 먼저, UART(Serial)data를 Read해야 하기 때문에 UART
	ENABLE을 합니다. 그리고 NVIC_Enable로 UART0에 인터럽트를 걸게 됩니다.
	그렇게 되면 인터럽트를 호출하여 void UART_IRQHandler(void)문에서 인터럽트가 걸리고 원하는
	기능을 넣어 구현시키면 됩니다. 여기서 UART Data를 Read할 때, interrupt를 걸어야합니다. */

	/* 2. interrupt의 목적은 Serial Data를 Read할 때, 사용하는 것이므로 SerialToEther(sn)에
	있던 구문을 void UART_IRQHandler(void)로 가져와서 구현합니다. 여기서, 1번 문제인 Data를
	한번에 전송하는 것은 아직 구현이 안되어 다음에 구현하도록 하겠습니다*/

 [/code]
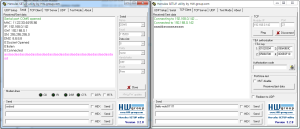
- 아래의 그림은 Hercules 프로그램으로 확인하였는데, 문제가 있었습니다.
Server에서 Client로 보내는 Data가 짤리는 것을 확인할 수 있습니다.
그래서 다음 과제는 Data가 짤리는 현상도 해결함과 동시에 Data도 한번에 날라갈 수 있게 구현해보겠습니다.
다음 과제
1. Ring buffer 사용.
2. Data 한번에 출력.

